Manual · Workflow
One-Click Workflow & node graph
Generate reusable host assets from templates or plain language with One-Click Workflow and run short-drama storyboards through the episode pipeline; then add and wire nodes, run the task queue and look up every node type and typical workflow in the node graph.
7. One-Click Workflow
“One-Click Workflow” uses a preset template or AI planning to produce a reusable host asset (containing a complete node graph plus boundary I/O). Once created, drag it onto any canvas, feed it inputs and take its outputs like a component.
7.1 How to open
- Open any project to enter the workspace.
- Click One-Click Workflow in the top bar.
7.2 Presets and description
- Preset templates (covering the main capability nodes by industry): game user acquisition, game UI, character design, storyboard-to-film, product ads, e-commerce livestream, game 3D assets, world model, comic publishing, knowledge talking-head, 3D blockout previz, short-drama storyboard, custom, and more. Presets with a fixed topology can be previewed directly with “Preview template”. “Game UI” builds a full chain of planning document → UI screen breakdown → UI screen generation, where UI generation can dive into the inner graph to render screen by screen, with a global style reference keeping the look consistent.
-
Industry templates and capability nodes: “E-commerce livestream” chains ad variant matrix plus
layer separation; “Game 3D assets” chains 3D model generation → director
stage → blocking shots → showcase video; “World model” chains
spatial world generation → world export → 3D director stage (the world node's output
is the strictly typed
spatialWorld, so it has to go through the export node to become a model before it can feed the stage); “Comic publishing” chains storyboard images ×3 → comic page (panels / balloons / transparent-background export); “Knowledge talking-head” chains script → voice-over + talking-head video → lip sync; “3D blockout previz” chains panorama reference → director stage AI blockout → blocking shots → previz film. Each template's note node documents its step-by-step usage. - Workflow description: describe your goal in plain language (e.g. “script → storyboard images → vertical short video”); you can pick a preset first and then edit the description.
- Models: the text model drives AI planning; the default image / video models are written into the initial parameters of generation nodes.
7.3 Preview → create
- Click Preview template (fixed presets) or Generate preview with AI (needs a text model; shortcut Ctrl+Enter / ⌘+Enter).
- Inspect the nodes and link topology in the preview area; open the run log to watch the model's planning process.
- Confirm with Create workflow, then choose a save directory and name.
- The new host asset appears in the asset library; drag it onto a canvas to use it.
7.4 Using it after creation
- Drag it from the asset library onto the canvas → connect upstream text / images to the host inputs.
- Double-click or Dive into the inner graph to fine-tune nodes, models and prompts.
- Select a boundary output or the host node and use “Add to tasks” to run the whole inner chain; it can run in parallel with other chains (see §8.3).
7.5 Episode pipeline: the Agent window
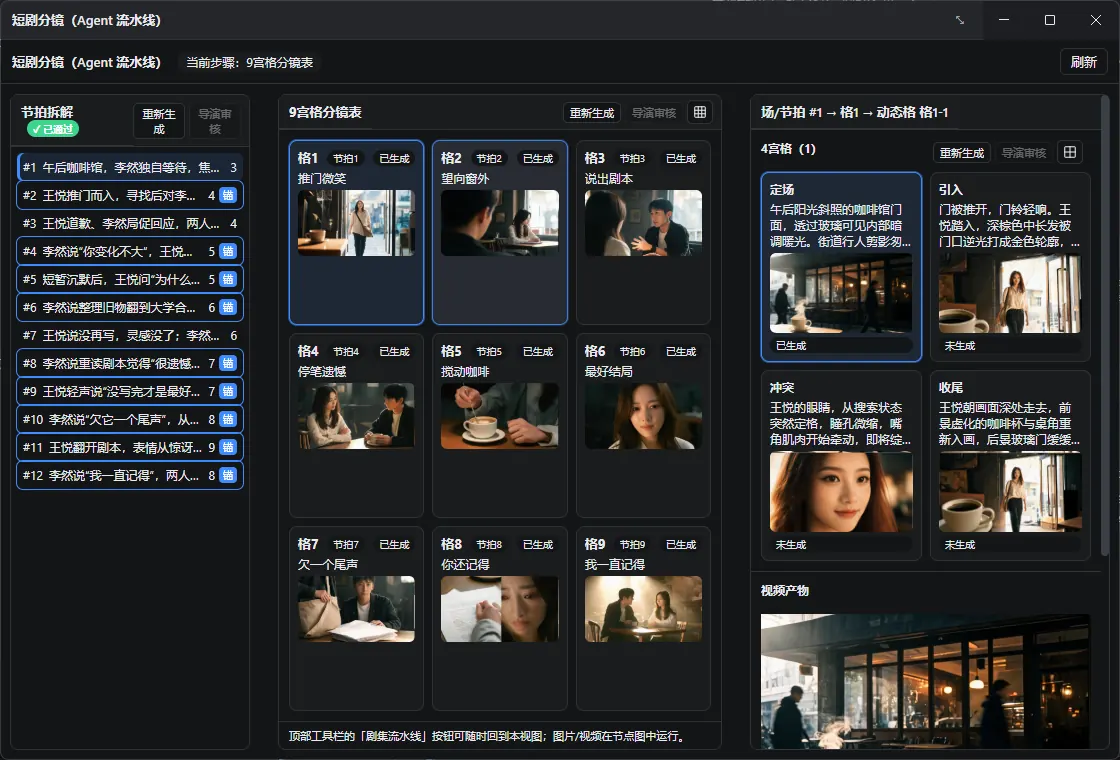
After creating a host asset from the “Short-drama storyboard (Agent pipeline)” template, click “Episode Pipeline” in the top toolbar to open a dedicated flow window and finish storyboards, tiling, review and video generation in one place. See the Short-Drama Guide for the full walkthrough.
- Three columns: beat breakdown (left), 9-grid storyboard table (center), 4-grid detail (right); drag the dividers to resize each column.
- 9-grid tiling: click the grid icon to generate the entire 3×3 sheet at once and split out all 9 anchor images; regeneration and director review are supported.
- 4-grid: click the 2×2 grid icon to generate the current group's sheet; the right side shows the motion prompt and lets you generate / preview the current cell's motion video.
- Director review: the review button lights up only after that stage's “Regenerate” has written results back. Review defaults to PASS and only FAILs on blocking issues; FAIL reasons are written back and appended to that stage's re-run.
- Cascading invalidation: after a stage is regenerated, its downstream tiling / extraction / upscale / video are invalidated and show “Not generated”; clicking generate again re-runs the whole chain from the latest text, so new text never pairs with old images.
- Node inspector: with a “grid select / motion cell select” node selected, edit the cell (1~9) or group × cell (1~9 × 1~4) parameters on the right.
8. Node graph
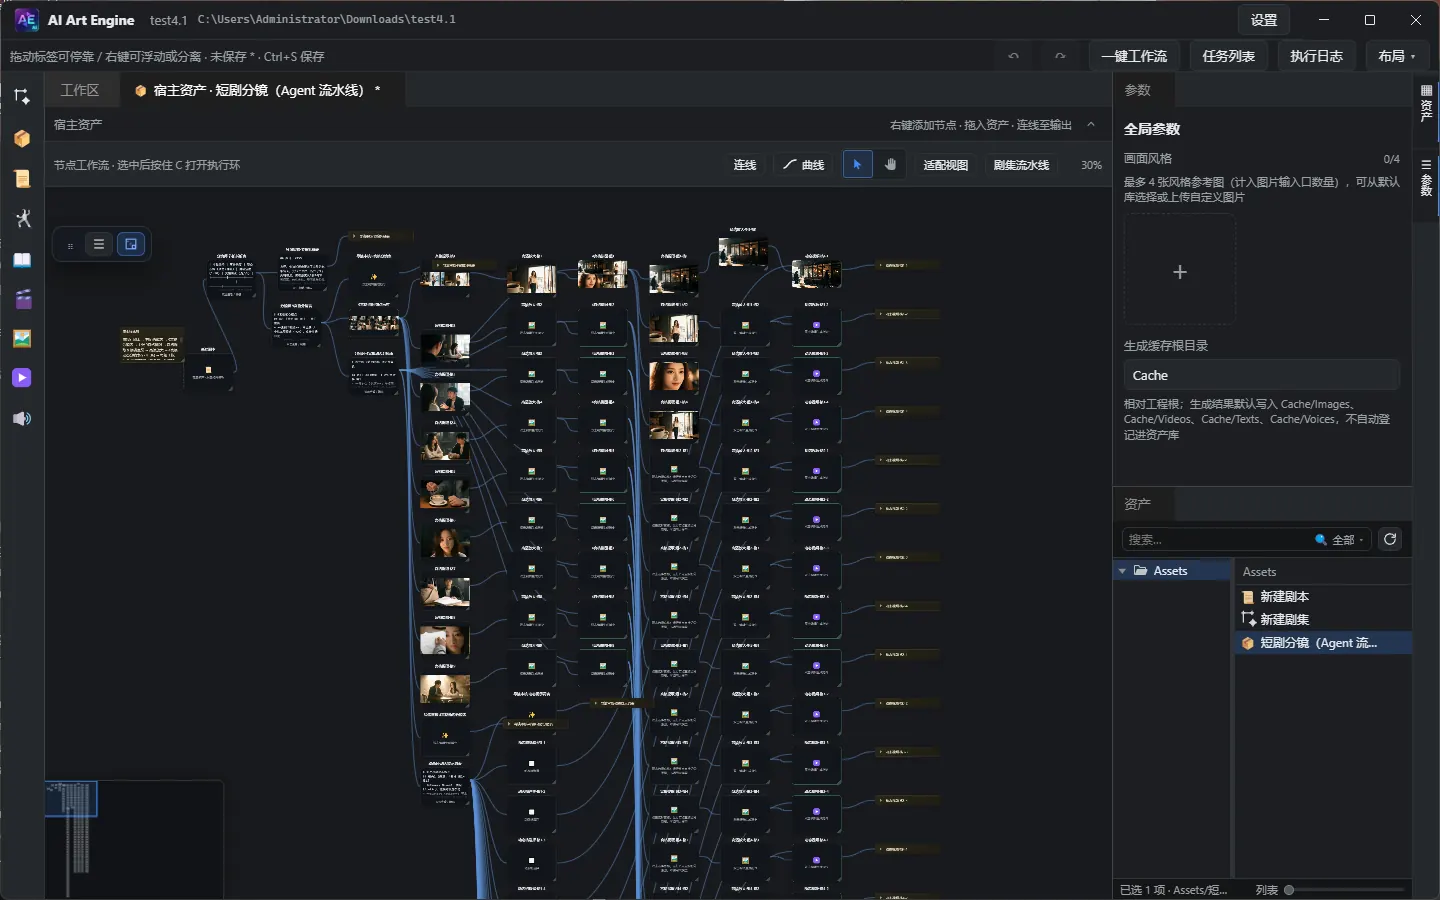
The node graph is the core orchestration surface. In scripts, shots, canvases, the director stage, host assets and similar scenes you wire nodes together into “input → generate → output” chains.
8.1 Add and connect
- Right-click empty canvas space, or press Space, then choose “Add node”.
- Drag a link out from a port; after releasing you can “select a node and connect”.
- Rewire: hold and drag an existing link (whichever end you grab is the one that changes), or drag out from an already connected input port onto another compatible port; release over empty space to disconnect. After marquee or multi-selecting links (Shift / Ctrl click), dragging one of them rewires several at once; dragging from an input port carries all of that port's incoming edges.
- Drag an asset from the asset library onto the canvas to create a reference quickly.
- Select a node or edge and press Delete / Backspace to remove it.
Image / video / audio / script gallery generation nodes have two outputs:
out (the currently selected single item, auto-connected by default) and
out-all (the whole history, a square port). Each successful run selects the newest item
automatically; click a history entry in the Inspector to change the current out.
Director stage edit nodes use two square outputs: out-shots (blocking
shots, images) and out-actions (motion captures, videos).
Legacy out / out-all links migrate to out-shots on load.
Structured directory ports use the dedicated types world /
worldEntities / beat (shown as world elements / world element entities /
shot) — don't mix them with plain text.
Port types must match: singular and plural don't interoperate.
image can't go into images, and the same applies to video /
voice / text. Select image / video / audio / text nodes
accept list ports only: feed them from an upstream out-all (or the director stage's
out-shots / out-actions); the default round out won't
connect. A script node's text also can't go straight into “Select text”.
Generation nodes support locking: when enabled the model call is skipped and the gallery or previous output is reused (toggle it with the lock icon on the node card or in the Inspector).
8.2 Toolbar and canvas interaction
- Select / pan · fit view · grid and snapping · align / distribute · auto layout.
- Link style: curve / orthogonal / hidden (the preference is remembered).
- Minimap: bottom-left overview with a viewport box; it can also be toggled when the layout bar is collapsed.
- Wheel zoom runs roughly 1%–1000%; clicking the zoom percentage resets related view habits.
- Execute / stop / add to tasks.
-
Project globals: right-click empty graph space and open “Global parameters” —
project name, visual style (up to 4 style reference images, picked from the default style library
or uploaded, including a “UI style” category), a global random seed (image / video generation
nodes follow it by default and can opt out individually, which makes runs reproducible) and the
generation cache root (results are written to
Cache/Images,Cache/Videos, etc., and aren't registered in the asset library automatically). - Prompt editor reference preview: hovering a referenced node's thumbnail pops a preview — images are shown size-limited and text shows the opening paragraphs (sidecar txt / md content such as scripts is read automatically).
Image previews on node cards and in the Inspector are shown in full with letterboxing, so they're never cropped by a different aspect ratio.
8.3 Execution and the task queue
| Method | Description |
|---|---|
| Toolbar “Execute” | With a selection it runs the selected nodes and their upstream; with none, it asks for confirmation before “Execute all nodes”. |
| Hold C | Opens the execution ring: run current / re-run / skip upstream / force upstream / add to tasks / stop. |
| Node right-click | Run current · re-run · stop. |
| Task list | Background workflow queue. Selecting an output terminal then “Add to tasks” runs only that sink's upstream; with no output selected it runs the union of every output chain in the graph. |
done. The sinks
themselves still run individually. To force a shared node to re-run, clear its run state or unlock
it before queueing.
Group: Ctrl+Shift+G; ungroup: Ctrl+Shift+U.
8.4 Fault-tolerant run mode
Single-node debugging stays strict: a failing node stops the run immediately and
reports the error, which is best for isolating problems. But long chains such as
whole-graph runs / add-to-tasks / agent pipelines automatically enable
fault-tolerant mode: a failing node falls back to cached or gallery outputs, is
marked degraded, and downstream keeps executing — a long batch doesn't
restart just because one node hiccupped.
- Degraded nodes are flagged in the run log, pipeline overview and node state
(
degraded+ failure reason). - Best for “partial failure is acceptable” batch scenarios; when debugging, use single-node execution to keep the strict fail-fast behavior.
8.5 Node types at a glance
Generation / assets
- Image generation · video generation · audio generation · script generation · shot generation · world element extraction · planning doc generation · director stage edit · canvas edit · 3D model generation · spatial world generation · 3D mesh processing (rigging / rig check / animation retarget / split / part completion / retopology / texture / format convert) · 2D frame animation · decisions · model (reference) · host asset
- 3D model generation: text / upstream reference images → a 3D model asset (Meshy, Tripo, Rodin (Hyper3D), Luma AI, Lux3D; text-to-3D / image-to-3D, with multi-image to 3D on some); submit async → poll → download, and the result can feed the director stage or downstream nodes, with write-back binding persistence and cancellation. Generation nodes output geometry only — rigging and the rest moved to the 3D processing nodes below (no inline “Generate rig” since 6.4.1).
-
Spatial world generation (
asset.spatialWorld): text, 1–4 reference images or one reference video → an explorable 3D world (World Labs Marble; four models — 1.1 / 1.1-plus / 1.0 / 1.0-draft, the last two from the previous generation). The four input kinds are mutually exclusive (text / single image / multi-image of one scene / video), and when both a video and images are connected the video wins (same rule as lip sync); reference videos should be mp4 / webm / mov / avi and are capped at 100MB each (an upstream hard limit). The node card also offers a panorama mode (is_pano: auto-detect a 2:1 equirect panorama / force / off — single image only, and a panorama gives the model complete spatial information, usually more accurate than a plain photo), verbatim (disables upstream recaptioning so your brief is sent as written) and a seed. Without instructions the upstream recaptions the input itself, so the same reference image can yield slightly different worlds twice; tick “verbatim” and pin the seed to keep it reproducible. It uses the same async submit → poll → download path as 3D generation, and the world's GLB mesh is registered as a model asset (landing inCache/Modelsby default, exactly like 3D generation) — but to feed the director stage or downstream 3D processing nodes you must go through the “World export” node: the world port is strictly typed (spatialWorldconnects only tospatialWorldand is not implicitly compatible withmodel), so wire the world into the export node first and use its exported mesh from there. Multi-image references are capped at 4, and local images / videos are uploaded to World Labs managed storage by default (the official media-asset flow:/marble/v1/media-assets:prepare_uploadthen a PUT to the signed URL), so no object storage is required; object storage is only a fallback when the hosted upload fails, and if both fail the error carries both reasons. One generation takes about 5 minutes and is billed in credits. As for the artifacts: the main output is the world's GLB mesh (the coarse collider mesh, 100–200k triangles), and the two assets that ship with the world are written as same-name siblings:*.spzgaussian splats (about 2M splats, Marble's native format — the preferred import for Unreal / Unity / Blender / Houdini) and*.pano.pnga 360 equirectangular panorama (2560×1280, reusable as a 2D panorama input). Both are free of extra credits, and their paths appear in the run log and the node inspector (select the node to copy a path). PLY splats or the HQ textured mesh come from the “World export” node (spatialWorld.export): wire the spatial world node's output (its port type is spatial world, distinct from the world-elements catalog port) into itsin-worldand pick what to export in the inspector — high-quality mesh (GLB: textured ~600k triangles / vertex colors ~1M triangles; an asynchronous upstream export that takes up to about an hour, is rate limited to 4 requests per hour, and is billed separately; the result is registered as a model asset whose output port ismodel— feed the director stage or downstream 3D processing nodes from there) or PLY splats (a synchronous upstream conversion written as a same-name sibling of the world GLB,world.ply; it is not registered as an asset — but you can import it into the asset library, or wire its relative path straight into the director stage's 3D model input port, where the bundled Spark renders it on the stage: see 12.7 Gaussian splats; for engine imports still prefer the SPZ saved automatically). The export node only accepts theworld_idproduced by an upstream world generation node; without it the node fails loudly rather than exporting someone else's world. -
3D mesh processing (nodes): 3D rigging (Meshy / Tripo Rigging
API, with Mixamo or Tripo bone naming and GLB / FBX output), 3D rig check (free;
returns
riggableplus the recommended rig type), 3D animation retarget (Tripopreset:walkpresets / Meshy action-libraryaction_id, with the library loadable right in the panel), 3D mesh split (mesh / smart segmentation, listing the resulting part names), 3D part completion, 3D retopology (Tripo smart / basic tiers, Meshy remesh), 3D texture (incl. Meshy retexture) and 3D format convert (GLTF / FBX / USDZ / OBJ / STL / 3MF with FBX presets, pivot-to-bottom, UV packing). A per-provider capability matrix filters the UI: Tripo covers all 8 ops, Meshy covers 5, provider dropdowns only list vendors implementing that action, and the Inspector hides parameters the selected vendor does not understand. Two hard constraints: part completion only accepts a segmentation task id and retarget only a rig task id; when a task id belongs to another vendor (say a Tripo split feeding a Meshy texture node) the app falls back to uploading the model for a public URL. - Host asset: bring an existing asset (image / video / audio / script / shot / director stage, …) into the current canvas as a node — the output port type is that asset's port type; double-click a host asset node to dive into its internal workflow (see 8.6 Host assets and Dive).
-
Decisions: takes upstream text and asks an OpenRouter decision model a set of typed
questions (
noulyes/no,choiceone-of,scoreon an ordered scale). It has one text output — the verdict summary (e.g.is_bug=yes(0.96) team=payments(0.84)) — so downstream text nodes keep working; the full verdicts (per-option probabilities, confidence, thresholds) stay on the node and show up as probability bars under “Last verdicts” in the Inspector. The question list and the thresholds (noul yes threshold / choice min confidence / score min position) are edited there too.
Output
- Image / video / audio / script output · director stage output · shot output · world element output · final timeline
Utility
- Note · text · select image / video / audio / text · grid select · motion cell select · prompt optimizer · image-to-prompt · UI screen breakdown / UI screen generation · frame animation sheet · comic page · ad variant matrix · bundle
- Bundle: gather several upstream outputs (image / video / audio, …) into one group so they can be fed to an output or downstream node as a whole; also handy as a temporary organizing tool.
Motion (under the motion group)
- Frame animation sheet: double-click to open the prompt panel (character / FX / martial-arts presets, default prompt and system prompt); row / column parameters are appended to the prompt and an image model produces the sheet; the output preview supports deleting and selecting output images.
- 2D frame animation: takes a sprite sheet, set row / column parameters in the Inspector, and the node card plays a frame-by-frame preview automatically; cooking clears the previous output instead of accumulating.
Comics & ads
- Comic page: grid panels plus a speech balloon editor. Drag images from the asset library into a panel / import locally / fill from upstream in one click; each panel's image path can be cleared; panel size is adjusted by span with the right / bottom / bottom-right handles (continuous live preview, snapping to the grid on release); balloons can be dragged to move and scaled proportionally with corner handles (0.5~4×); clicking empty space sets page-level and panel background colors. PNG export defaults to a transparent background; cooking fills upstream images in reading order and composites a PNG into the gallery.
- Ad variant matrix: set the product description and aspect ratio, then double-click to enter variant dimension configuration and comparison preview, producing multiple ad variants on the same theme in one run.
QC & rework (retired)
Image editing (under the image group)
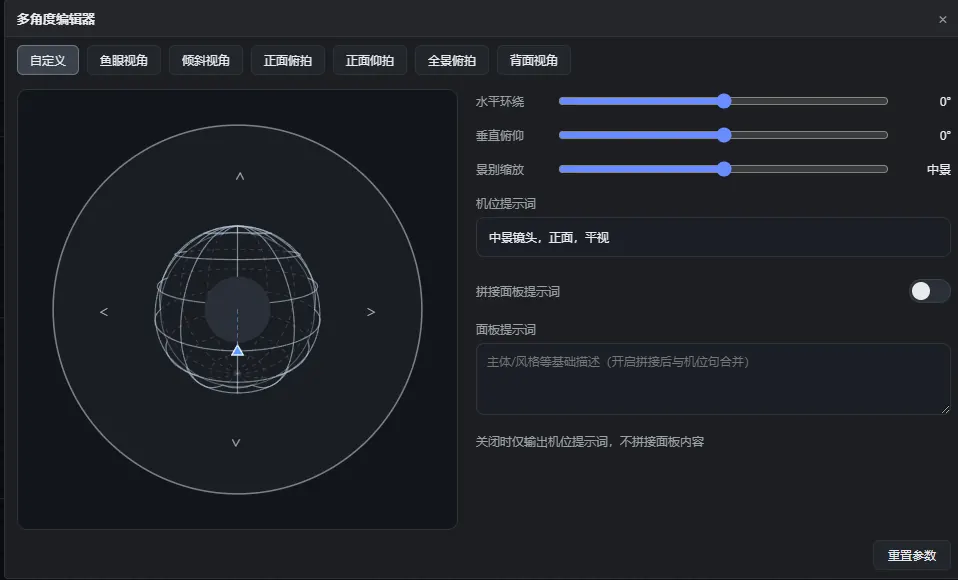
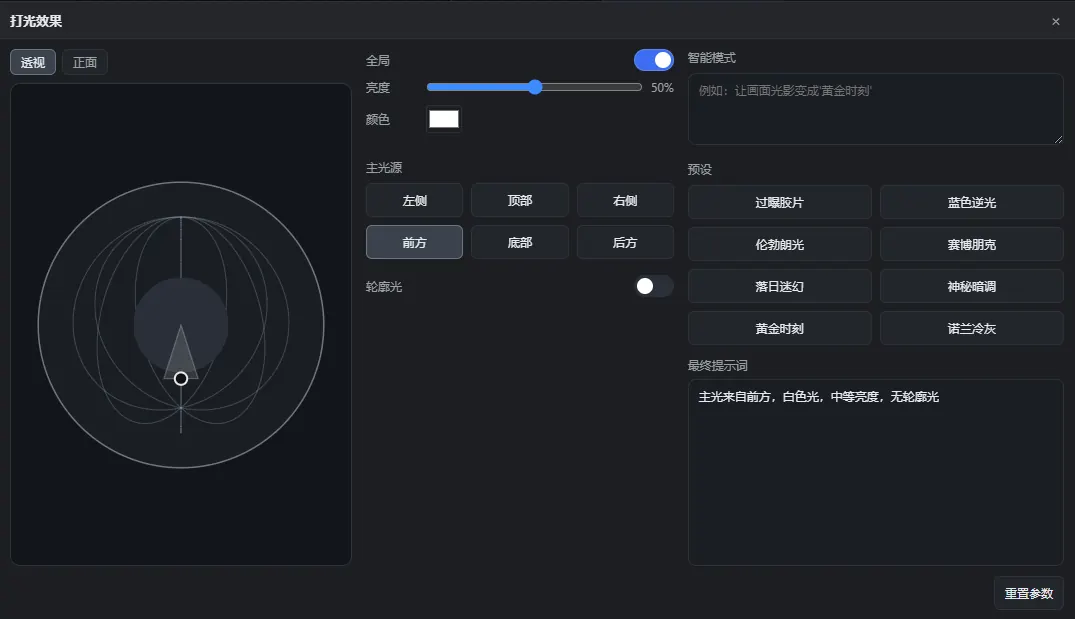
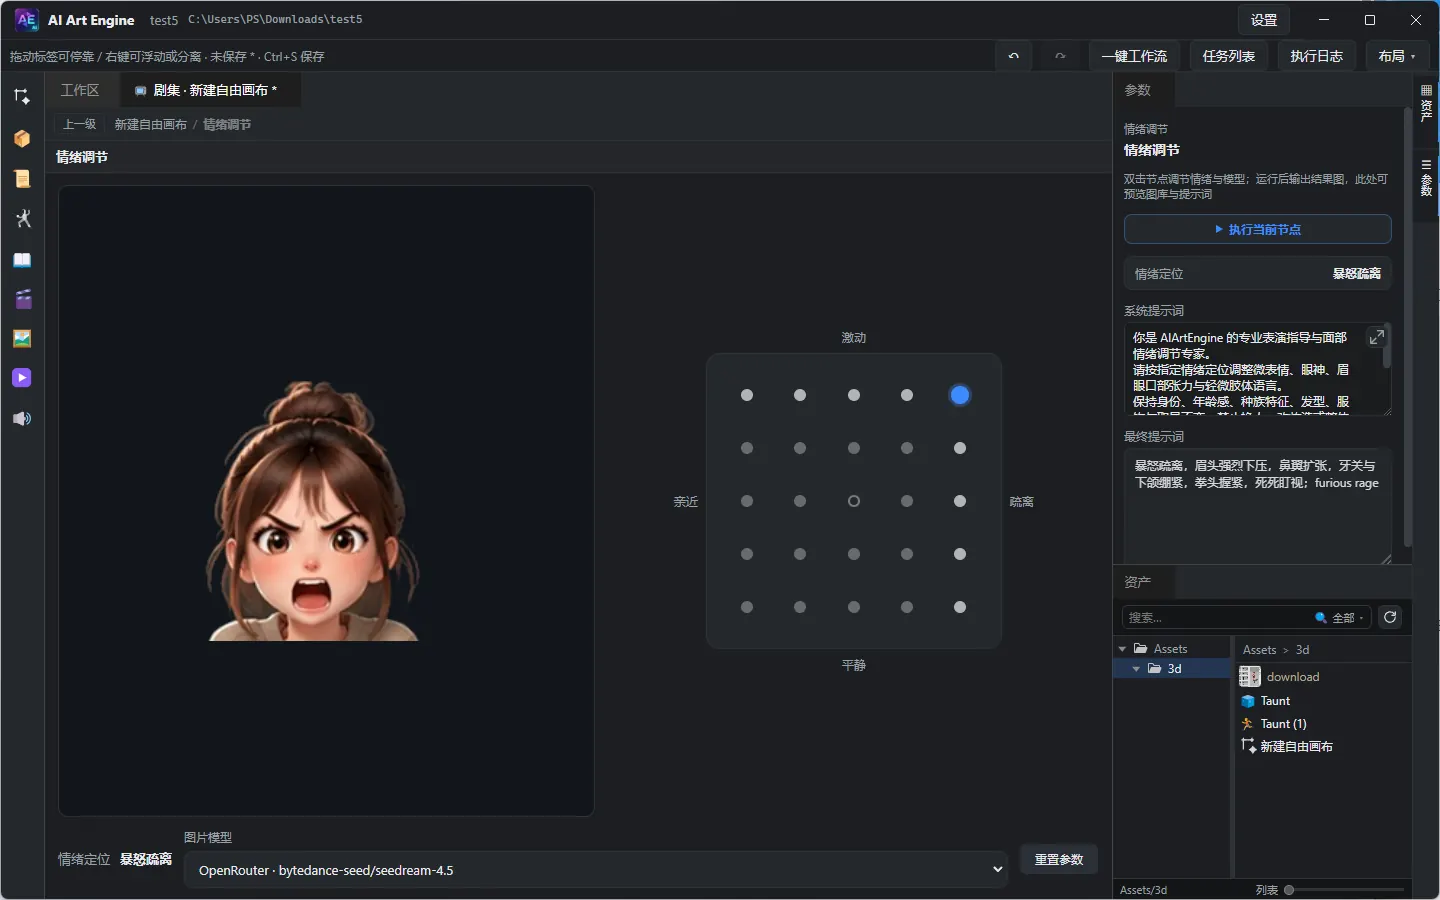
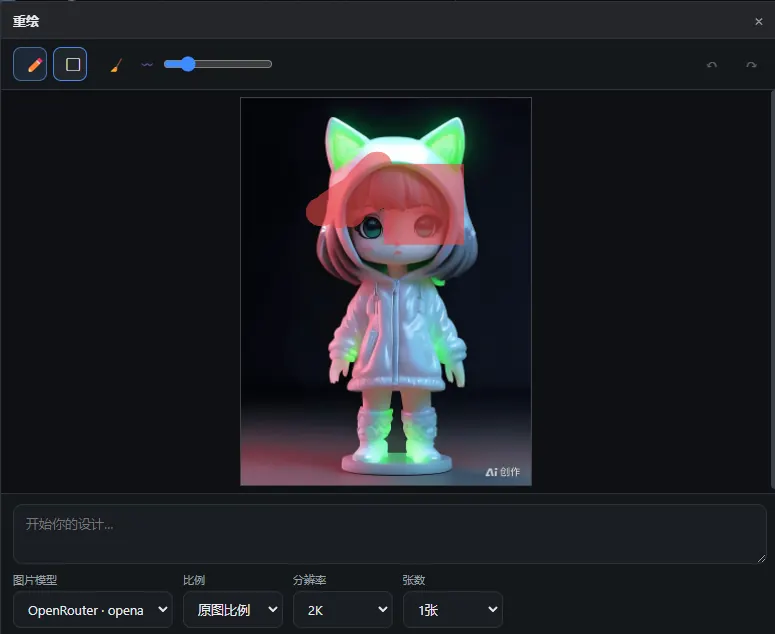
- Multi-angle edit · lighting effects · portrait texture adjust · portrait retouch · mood adjust · HD upscale · outpainting · repaint · erase · cutout · crop · image transform · grid split · layer separation
-
Image transform (
image.transform): purely local pixel work, no model call. Double-click the node card to open the editor: drag to move, scroll to scale, a rotation slider plus ±90° buttons, and horizontal / vertical mirroring, with an output frame (match source / 1:1 / 4:3 / 3:4 / 3:2 / 2:3 / 16:9 / 9:16), an output size (match source / 1K / 2K / 4K) and a fill for the exposed areas (transparent / white / black) — all previewed live. Closing the window writes the parameters; run the node to render locally. With "match source" frame and size, rotating grows the canvas to the rotated bounding box, so nothing gets cropped at any angle. -
Portrait retouch (
image.portrait): PixCake-style retouching. Double-click the node card to open a dive editor with 14 tool groups along the top rail: heal (blemish / under-eye / wrinkles / shine / red eye / stray hair), skin (smoothing / pore texture / evenness / denoise), tone (whiten / rosy / de-yellow / warmth), face reshaping (slim / jawline / chin / eye size / eye spacing / double eyelid / nose / lips / brows), eyes (catchlight / whitening / pupils), makeup (7 looks with intensity and tone), body (shoulder-neck / waist / leg length), lighting (fill / rim / contour / ratio / light temperature / tone grade), colour (saturation / temperature / tint plus 11 LUTs), texture (sharpen / clarity / grain / soft focus / vignette), region (manual boxes plus a note and the local-scope switch), background (keep / solid / gradient / by description / blur only), ID photo (10 specs, background colour, 5-inch sheet) and export (output size / DPI). Intensities are five-step segmented buttons (off / light / standard / strong / max); makeup looks, LUTs, background handling and ID-photo specs are named options. The editor shows the exact prompt sent to the model live, copyable and collapsible. - How portrait retouch runs, and how it stays local: the parameters compose a prompt and the node calls the image model you pick (no model call means no pixel change); ID photos are then cropped to spec and optionally tiled to a 5-inch sheet. Wiring several images into one node retouches them in one batch with the same settings (up to 24) and face landmarks are cached per source-image fingerprint. Framing follows the source image (its ratio is mapped to a standard aspect the model accepts, so a portrait shot never comes back square), and "output size = auto" renders at the source's size and then fits the result back to the exact source pixel dimensions (picking 1K / 2K / 4K instead keeps that tier's size). "Affect only the matching area" is on by default: the model renders the whole frame, then the result is feathered back onto the original through the face (with neck) / person / manual-region-box mask, so everything else keeps the exact original pixels — smoothing no longer blurs the clothes and background, and slimming no longer warps the scene. Solid / gradient backgrounds are flattened locally by default: after generation the local person segmentation forces everything outside the subject to the target background, so the result is guaranteed clean (residue the model forgot is wiped) — ID-photo background colours work the same way, and you can switch it off in the Background group. Background swaps, ID photos and colour grading are whole-frame by nature and stay whole-frame (otherwise the mask would crop those global effects); when face landmarks or the segmentation model are missing, that part falls back to the whole frame with a line in the run log — never silently. The switch sits at the top of the Region group; turn it off to go back to whole-frame.
-
Portrait editor: before/after comparison (
⇆hold to see the upstream source;◐split compare with a draggable divider), wheel zoom, view rotation with Shift+wheel or[], Space / middle-drag panning (double-click empty space or click the zoom percentage to fit, click the angle readout to reset rotation) and undo/redo. In the Region group you draw boxes right on the image (six kinds: blemish / smoothing / brightening / slimming / background / erase); each box becomes a positional phrase such as "a small patch in the upper left" in the prompt. "Save & generate" no longer closes the window: the button and the canvas show progress, failures stay in the window, and when it finishes the left image switches to the product so you can compare it with the previous one. Tool groups with an unmet dependency are greyed out with an explanation in the tooltip and the parameter panel (7 groups need face landmarks, Background needs the segmentation model, Body needs the pose model). The in-editor AI enhance actions (smart erase / new background / makeup boost / upscale) call the image model directly and store their results as rollback-able node versions; the inspector carries the shared output preview (thumbnails / full screen / save to library / pick a version), and reopening the panel defaults to the node's current output. -
Layer separation (Seedream 5.0 Pro
layer_decomposition): split an image into a base image plus up to 16 transparent PNGs, reorder layers in the dive editor and recompose locally; supports wheel zoom and Space-drag panning, and exports PSD (preserving layer order, position, size, alpha channel, names and nested groups) or PNGs grouped into subfolders. -
Retouching / image editing happens in Dive; options and prompts are
written back to the node
paramsin real time and stay visible in the Inspector. Preview opens as a dialog rather than taking a Dive tool slot.
Audio (under the voice group)
- Voice · multi-speaker dialogue · sound effect · music · select voice
-
Voice (
asset.voice): TTS dubbing. The text in the instruction box is what gets read aloud, so this node shows no system prompt (otherwise that instruction would be read out too). It accepts text and a reference image upstream (Ark voice design uses the first image); the voice is picked per node in the instruction panel, and an empty voice falls back to the model default. -
Multi-speaker dialogue (
asset.dialogue): synthesize a whole dialogue in one call (ElevenLabs/v1/text-to-dialogue). Write onespeaker: lineper line (both ASCII and full-width colons work); lines without a colon keep the previous speaker (narration / continuous monologue). Bind a voice per speaker under “speaker voices” in the Inspector; unbound speakers fall back to the node default. A missing voice is reported naming the segment index and the speaker — it never silently uses the wrong voice. The output is one dialogue audio file (a voice asset). -
Sound effect (
asset.sfx): uses the dedicated sound-effect endpoint (ElevenLabs/v1/sound-generation). Describe the sound itself (“rain falling on a tin roof”), not a spoken line. The Inspector offers “seamlessly loopable” (common for ambience), “expected duration” (spec range 0.5–30 s) and “prompt influence” (0–1, default 0.3). Files land inCache/Sfx. The endpoint’s model is a single fixed value (eleven_text_to_sound_v2), so the dropdown on the card actually picks which provider instance to use. With no provider available it says so explicitly instead of falling back to speech synthesis. -
Music (
asset.music): composition / BGM. Text only (a composition brief plus optional lyrics) — it does not use voices. Models come from the “Music” tab in Settings (kept separate from the “Audio” tab): OpenRouter (Google Lyria 3), ElevenLabs (music_v2_5and friends), MiniMax (music-3.0/music-2.6), DashScope (fun-music-v1). The Inspector offers an “instrumental (no vocals)” toggle and a lyrics box (supports structure tags such as[Intro]/[Verse]). Files land inCache/Music. Music and voice are two separate modalities: the music dropdown never lists TTS models and vice versa. -
Select voice (
voice.select): pick one voice from several upstream voices as the current output — commonly used in multi-branch dubbing flows.
Video editing (under the video group)
- Lip sync · frame pulling · segment reshoot; frame pulling and segment reshoot open sub-windows on double-click (pull station / reshoot station), sharing the “double-click to open a sub-window” interaction with image editing.
- Frame pulling: connect an upstream video and double-click to open the pull station, browse frame by frame and grab / annotate key frames for storyboards or prompts.
-
Segment reshoot: connect the source video and double-click to open the reshoot
station, mark the start / end time to change and describe the change; running it reshoots only
that range (Seedance 2.5 timestamp-level editing) and leaves the rest untouched. The prompt box
supports
@references to port media, and the video model can be picked on the right.
Shot / world
- Shot breakdown / shot table / shot generation / shot reference · select shot · world element extraction / world element review / world element generation / world element entity output
- Select shot: pick one shot (or match by condition) from several upstream shots as the current output — commonly used to decide which shot continues in a multi-branch shot flow.
World models (under the world group)
- Spatial world generation · spatial world export · world element extraction / world element table / world element generation
-
Spatial world generation (
asset.spatialWorld): text, 1–4 reference images or one reference video → a walkable 3D world (World Labs Marble; 1.1 / 1.1-plus / 1.0 / 1.0-draft). See the detailed notes under “Generation / asset nodes” above and the worked flow below. -
Spatial world export (
spatialWorld.export, World Labsworlds/{id}:export): turns a world into a mesh that downstream nodes accept. Spatial-world ports are strictly typed (aspatialWorldport only connects tospatialWorldand does not implicitly acceptmodel), so going “world → Director Stage / 3D processing” must pass through this node. Two modes:- Mesh (default): HQ mesh → GLB, either textured (about 600k faces) or vertex-coloured (about 1M faces). The result is registered as a model asset that feeds the Director Stage or the 3D processing nodes directly. The upstream service is asynchronous, takes up to about an hour, is rate-limited to 4 calls per hour and is billed separately.
-
Gaussian splat (PLY): the official synchronous conversion writes a PLY next to the
world output in the same directory and under the same name (
world.ply), with an optional resolution (full_res / 500k / 150k / 100k). PLY has no preview channel and no matching asset type in the app, so it is not registered as an asset — only the path and a log line are written back, and the upstream world output is passed through so the chain does not break on the canvas.
-
World element nodes: world element extraction (
world.extract— pull reusable elements out of a world or a panorama), world element table (world.table— a catalog/table node that only passes data through and stores it inparams.text, calling no generation model) and world element generation (world.gen— render images element by element), used together with the canvas and world-element flows.
Others
- Graph plugin sample (loaded only for local debugging; absent from official installers)
8.6 Typical node workflows
- Script: create a script → pick a text model on the right → fill in “generation prompt” → run the generation node → connect it to “script output”.
- Shot: script → “shot breakdown” → “shot table” (run to import JSON) → “shot generation” / video generation → “shot output”; for batch storytelling use the One-Click Workflow “short-drama storyboard (Agent pipeline)” template.
-
Image / video: connect upstream references into the generation port → reference
them with
@in the prompt → execute → export the result with an output node. To build video and reference video from scratch on a free canvas, see the dedicated guide. - Final cut: shot / video node outputs → open the script asset's final timeline → drag clips onto tracks, assemble and export.
- Dubbing (single character): text / script → “voice generation” → pick a voice in the instruction panel and enter the text to read → run → “voice output”. What you type in that box is spoken verbatim, so do not put instructions like “use a gentle tone” there.
-
Dubbing (multi-character dialogue): “multi-speaker dialogue” → write
Alice: line/Bob: lineone per line → bind a voice per speaker in the Inspector → run to get the whole dialogue as one audio file. One node produces the entire exchange, which sounds more natural than stitching line by line (the delivery stays continuous). -
Sound effects: “sound effect generation” → pick a provider instance → describe the
sound itself (“rain falling on a tin roof”) → tick “seamlessly loopable” for ambience and set the
duration as needed → run. Files land in
Cache/Sfxand can be dragged straight onto the SFX track of the final timeline (the timeline's “generate SFX” button hits the same endpoint). -
Score / BGM: “music generation” → first tick your music models on the “Music” tab in
Settings → write a composition brief (style / mood / setting); for vocals turn off “instrumental” and
add lyrics → run. Files land in
Cache/Musicand can be dragged onto the timeline's music track. - Walkable world: “spatial world generation” (text / 1–4 reference images / one reference video) → “spatial world export” → feed the exported mesh into the Director Stage to block camera moves, or into the 3D processing nodes to keep working on it. You cannot skip the export node — spatial-world ports do not implicitly accept model ports. Elements inside a world can be pulled out with “world element extraction”, managed with “world element table” and rendered one by one with “world element generation”.
- One-Click Workflow: create a host from the top bar → drag it onto the canvas and wire it up → Dive to fine-tune → add to tasks.
8.6 Host assets and Dive
A host asset (including One-Click Workflow output and selection wrappers) exposes only boundary inputs / boundary outputs on the outside; double-click or Dive into it to edit the full inner topology.
- Boundary outputs map one-to-one onto sinks: several same-type results (e.g. multiple character sheets) each get their own outlet instead of being merged into one.
- Note-style text nodes aren't exposed as host outlets by default.
- The whole inner chain can be queued in the task list; a host node also participates as a black box in larger flows on the canvas.
- Retouch / image editing tools operate inside Dive and write options back to node parameters; large previews open as dialogs.